Monday, September 19, 2011

Freezing Fall Cookies

We are officially in the midst of football season out here in W.Tex! We've survived a home tailgating with all limbs still attached, and we're looking forward to many more this fall.

In preparation for more out of town visitors and football-watching, I've decided to pre-make a few cookie recipes and freeze them. When we have visitors coming, I can then thaw the cookies, prep, and bake without dirtying a bunch of dishes!

I absolutely love fall recipes. The pumpkin, cinnamon, and allspice smells that fill the kitchen are so relaxing! My mom loves fall, so our house was always so welcoming and homey during those months.

Here is how I freeze my dough for quick cookie-bakin'.


Freezing Cookie Dough

Step 1: Mix and Make
Make dough as directed. Bake whatever cookies you want to eat right then. Remember to save some dough to freeze!

Here, we're making some chocolate chip pecan cookies.

Can't forget the butter! Yum!

Done dough!


Step 2: Chill Out
Chill dough 1 hour. If this already isn't part of the recipe, chill for an hour. This firms up the dough so you can portion without sloppiness.
My nifty pampered chef covered mixing bowl right next to the Dead Guy Ale. Just chilaxin'.


Step 3: Prep Freezer
Decide what you'll be freezing in. I use mini muffin/tart pans to freeze my dough in. This keeps the cookies separate from each other. Also, if you end up with a soft dough that "melts" before its frozen, the mini muffin pan keeps a cookie-like shape.

Make sure you have room in your freezer for the cookies. I always have to clear some space to make sure this happens!
My mini muffin pans.


Step 4: Portion Control
Using a cookie scoop or two spoons to portion out your cookies. I use a medium scoop by Pampered Chef for the perfect size.

Medium pampered chef scoop. Perfect cookie size!

Voila! Perfectly proportioned cookies ready for freezing!

Close up. Look good enough to eat.


Step 5: Freeze Out
Freeze your dough for approximately 1 hour. I check after 30 minutes and rotate the dough. This assures even initial freezing. It also keeps your dough from freezing to the pans (makes the removal much easier).

No judgment, please. This is actually my freezer.
Note: below the muffin pans are the pumpkin snickerdoodles I froze the day before!


Step 6: Prep Containers
How are you going to store your cookies? Freezer bag? Food saver bag? Tupperware? However you slice it, it needs to be somewhat air tight and freezer friendly. I use freezer bags and freezer-safe glass/pyrex tupperware.

Label the container. For the freezer bags, I label with a sharpie. For my pyrex tupperware, I use a post-it taped to the top inside a baggie.

Make sure you include:
-Recipe Name (no mystery cookies!)
-Date Dough was Made
-Expiration Date (figure ~6 weeks from when dough was made)
-Bake Temp
-Bake Time (I add 2 minutes to my recipes)
-Special Prep (like rolling sugar, shaping, cooling, glazes, etc)

Baggie ready for filling. Note I put the expiration as 2 months instead of 6 weeks. I'm living on the edge!


Step 7: Fill & Freeze
Think about how you will be using the cookies. In groups of 6? 8? 12? 36? Fill your baggies or containers accordingly.

Time to freeze. Store your containers with like items (I keep all my cookies together toward the top of the freezer to avoid cross-contamination with frozen meats). Keep in  mind that you'll need to be able to see what the cookies are and how many you have. Rotate older dough to the front as you add more to avoid expiration.

Here they are! I froze mine in groups of 24. However, since they're individually frozen, I can take out however many I want/need!


Step 8: Enjoy
Decide how many cookies you want. Thaw cookies in the refrigerator on wax paper for 1 hour before baking. (Going straight from freezer to oven may work, but I get a little paranoid!) Follow the instructions from the bag and voila!


Wednesday, September 14, 2011

Succulent Garden

For some added greenery and life to our patio, we added a succulent garden.
Stephanie over at Under The Table and Dreaming has an awesome tutorial for creating your own succulent dish garden.

We used her tutorial plus a few googled tutorials/images to decide what we wanted ours to look like. When making a succulent garden, rocks are added at the bottom to ensure proper drainage. This creates an awesome layered look. We wanted to take full advantage of this, so we opted for a glass container.


First we added a layer of small river rocks about an inch deep. Next layer was a mix of potting soil, perilite, and sandy soil from our yard. The exact ratios of each of these is debatable. I encourage googling in regards to this. Next it was time to plant the succulents!

We selected 9 succulents from WallyWorld and TheOrangeStore with different growth patterns, colors, and shapes.


Our final layer was some more small river rocks to prevent the soil from moving around, assist with drainage, and look awesome.


Here's the final product. Love those layers!!


It has a nice home on our coffee table on the patio. They require thorough watering once weekly. It becomes quite easy to tell when it's time to water. The plants droop, discolor, or wither some when they need water. After watering, they return to their healthy look in just a few hours.

Monday, September 12, 2011

Working With Burlap (Cutting)

Burlap (a nickname for hessian cloth) is a very versatile material to work with. We used burlap for the outdoor patio curtains as a less expensive alternative to outdoor fabric. It weathers well and is quite inexpensive.

The weave of burlap is quite traditional. The threads running up and down are the "warp yarn" and the threads running left and right are the "weft yarn." (Think: Weft=West)

To cut a straight line in burlap, the easiest way to assure a straight line is to use the weft yarn as a guide. If you've never tried it, it will change your life! It makes cutting, crafting, and sewing burlap so much easier and less messy.

Step 1: Straighten Your Cut Edge
So, as great as the person who cuts your material is, they're still at work and in a hurry. To have an accurately cut piece, you need to straighten the edge yourself.

Start by ironing any creases and wrinkles out of your material (after you wash if desired/indicated). I don't have a big fancy sewing table. I was also banished from using our dining table after I accidentally cut a hole in our tablecloth. Oops! So....I use the floor of my living room (hence the wood in the pictures you're about to see). I've never claimed to be a sewer, so no judgment on my sewing practices!

We're going to be using the weft yarn to help create our straight edge.
Here, you can see how I've pulled my weft yarn out of the weave of the fabric. I actually pulled 2-3 lines to make sure I had a good straight line. This leaves us with a fringed edge.

 Next up, snip the weft yarn down at the very end of the fabric, before it turns to head back through the fabric. I use a little fray stop or fray check to help secure the remaining weft cut.

You're left with the uneven fringe from the original cut. Now you can take some sharp shears or a rotary cutter and create your straight edge like you see below.

Step 2: Measure
Measure from your newly straightened edge and mark where you need to make your new burlap cut. I tend to add about a quarter to a half of an inch so I can go back and straighten the edge (like we did above).

Step 3: Gather Your Weft
Wherever you need to begin cutting, make a small incision so that you can grab one of the weft threads.
 *Note: above you can see how uneven the "fold" of the fabric left from the bolt is!
Begin gently pulling your weft thread, creating a ruffle in your burlap.
 Gather your burlap using this weft thread all the way to the end of the fabric.
 Then, hold the end of the weft thread in one hand and cut/pull out the weft thread. This may take a pop to break the strand, or some small scissors to cut it carefully. Here is what you're left with...
 Now, doesn't that just look like a fun line to cut? Much easier than marking and measuring by hand.
Step 4: Cut Away
Go ahead an cut! You can be as particular as you'd like to be. Like I said earlier, I tend to cut and then go back and straighten.

Hope this helps someone out!

Friday, September 9, 2011

Operation Back Yard Part 6

When living in the "city," one has a house in the middle of a lot. Also, six feet of yard on either side. Hence the name "side yard." This area is often used as a walkway. Sometimes it's used as a junkway. 

This was the case with our East side yard. It never grew grass very well because it only received sun from noon to 3, never got rain, and was hot because of the large amounts of brick and concrete around. We used it as a graveyard for all our junk we didn't want to look at and didn't have space for in the garage.

Ew.

Solution? Lava rock and lots'o'weed block.

Step 1: Clear out the junk.
We trashed a lot of stuff: wood scraps, extra trash cans, old potting soil, ugly metal fence panels, and trash. We also stored a lot of stuff where it should go: speedy weedy, gas crawfish boiler thingy, other garden tools, and pavers.


Step 2: Eliminate weed-trees and grass.
There are these lovely weed-trees that tend to grow just about anywhere out here in W.Tex. We've always cut them back but never got rid of the root. Well we dug out about three that were about 3-4" diameter.

Next, we used some fancy-shmancy grass killer to kill off all the bermuda and other weeds. This made them easier to pull out from the root just before raking.


Step 3: Rake and grade ground.
We took a rake to the tree/grass-free yard to get rid of the extra dead leaves/grass/big clumps o'dirt. Travis took a shovel and chopped up the dirt to give us some extra to work with.

Because we don't want water pooling around the foundation, we graded the dirt from West to East and North to South. Slightly higher next to the house so water would drain away. Slightly higher toward the front of the house so water would drain toward the back yard.

We could have been really picky, but because we're lazy we eyeballed it.


Step 4: Weed block the world.
We were real tired of the "landscaping fabric" method of weed-controlling. So...we decided to just kill whatever the heck was planning on growing below it. A roll of 6 mil black plastic was our weapon.


Step 5: Lava rock it.
We wen't to a few places to check out prices on lava rock. Apparently they vary way more than I thought. For our space we needed approximately 6'x30' which is about 180 sq ft.

Our local nursery sells bulk materials and was very helpful deciding how much we should estimate for. They have information on cubic feet and yard coverage by square footage and depth here.

We compared prices based on approximately 1 cubic yard [CY] (27 cubic feet [CF]).
$100 + $45 = $145.00 Local Nursery - 1 CY Bulk + Delivery
$4.99 x 27 = $134.73 Local Nursery - 1 CF Bag
$3.99 x 54 = $215.46 OrangeStore - .5 CF Bag
$3.80 x 27 = $102.60 BlueStore - 1 CF Bag

Um....OrangeStore?! What the french toast?! We even asked the cashier to double check the price. That was way unexpected. Initially, the bulk load sounded like the best idea, but with the hassle of delivery plus the extra cost and having to wait to complete the project we nixed it. We didn't check WallyWorld because they employees there are never helpful and I pretty much avoid that store if at all possible. The BlueStore ended up having the best price so we went with them.

We started with 15 bags, which got us about 2/3 finished. We made a second trip for 10 more and were able to go about 3" deep in some places.


Step 6: Reflect and Enjoy
Total cost for this side-yard makeover:
$00.00 - Clean Up
$20.00 - Black Landscaping Plastic
$102.84 - Lava Rock (Self-Delivered and Installed)
-----------
$122.84

Also, this was a single-day project. In fact, it was a 5-hour project. Perfect for my short attention span!

Well worth it if you ask me. No more trees. No more mowing. No more spiders living in the old wood (ew). Looks nice with very little effort.


Tuesday, September 6, 2011

Operation Back Yard Part 5


I'm not gonna lie...I'm pretty much in love with our patio! It did need a few final touches, including some lighting and accessories.


Step 1: Lighting

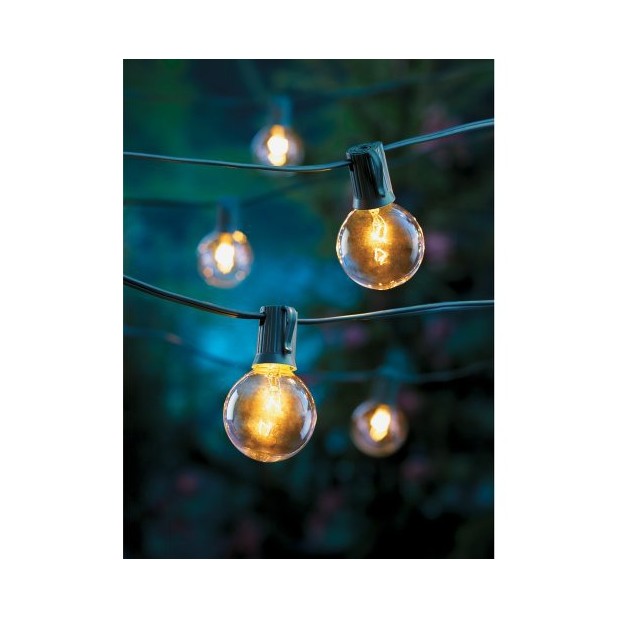
Soft lighting was a must, and I just love the traditional/industrial look of clear glass bulbs. We went with these lights from TheRedStore.

We used a total of 3 strands, and we bought two extras for replacement bulbs. They're currently powered by an extension cord that's strung to an outdoor outlet on the side of our house. Eventually our goal is to wire a more permanent set-up. 

When it decides to rain out here in W.Tex we'll also have some nice light coming from the fire pit in the yard. 


Step 2: Accessories
This is a great time of year to purchase outdoor accessories. They're all on sale/clearance! Pillows were a must for our economically-friendly furniture set. We went with four square pillows from TheOrangeStore on sale for 50% off! We used coordinating fabric for the tie backs for the curtains, also.

For my birthday this year, my coworkers bought me this mini fire pit from World Market. It fits nicely on a wrought iron plant stand we had. It works great as a mini smoker with some mesquite chips to keep the mosquitoes away (although that is the only good thing about no rain...no mosquitoes!).

Step 3: Plants
For the centerpiece on the coffee table, we created our own succulent container garden! More on how we did that to come.

We also purchased some tall, green planters that were on sale at TheOrangeStore. They coordinate perfectly with some sweet potato vine and purple fountain grass! Plus, the sweet potato vine grows like a weed and fills in and spills over the containers nicely.

Sunday, September 4, 2011

Operation Back Yard Part 4

We love West Texas. We do. Great people, all the amenities you could ask for, big blue sky, and football. 

What we do not love about our beloved W.Tex is the sun and heat. Hence, the pergola. The sun sets in the West, giving us breathtaking sunsets.


However, when entertaining in our new back yard, sun is the enemy. Direct sun = heat. Lots of heat. Sometimes up to 20* difference between sun and shade. 

Solution? Outdoor curtains!

Step 1: Plan, plan, plan.
I definitely wanted curtains on both the East and West side of the pergola (2 panels each). I also wanted some smaller panels on the South side (2 panels). So, a total of 6 panels is what I decided on.

Can I BuyIY (BuyItYourself)?
Quick answer? Nope.

Sunbrella curtains from Ballard Designs cost about $100 per 84" panel. At six panels, we're talking $600 on a good day, $650 with tax, and over $700 with fixtures. Ew. I wanted curtains but not that badly. Also, they come in a couple of shades and are one sided (there's a right and wrong side) which is not very practical for curtains if you want to stand in the yard and see them.

There are a few cheaper options, but they're still nowhere near practical for me. Pottery Barn has drapes on clearance now for $41 per panel. That would be $260 with tax and over $300 with fixtures. Half price, but still too rich for my blood.

So...DIY it is. 
Pinterest and google are great. I found some awesome inspiration pictures like these:


There's a great tutorial over at Everyday Expressions for the above DIY outdoor curtains that gives good information, too.

I decided to go with burlap. It's a material that will weather fairly naturally. It comes in a variety of neutral colors, and those colors will hide our beloved red dirt/dust nicely. Also, it's pretty inexpensive.


Step 2: Gather your materials.
22 yards of burlap x $3.99 at HobLob - 50% off coupon = $47.51

3 Threads x 2.79 - 40% = $5.43

4 pkg X-Lg Eyelets x 9.99 - 50% = $21.63

Washers = 10.00?

Total of  $84.57

Yup, I'll take it.


Step 3: Measure a billion times, cut once.
I have a separate post talking about the methods of cutting and squaring burlap here.

The dimensions for each panel I made were slightly different because of the slope of our concrete patio. For a custom look, I measured each hem separately.

The South panels were the easiest. One panel width was 48" (stock width of burlap). So all I had to do was hem the top and bottom.


The East and West panels were a little more difficult. I patched them to create a wider panel. Each panel ended up being 72" (48" + 24"). To seam them, I sewed using a zig zag stitch with the zig on one piece and the zag on another. I'm no seamstress, so please don't judge my homely sewing!


Step 4: Get your hardware.

Instead of traditional large curtain grommets, I went with smaller "Extra Large Eyelets" which were about 1" diameter. They felt sturdier to me. Just a personal preference.

To hang the curtains on the pergola, we used your basic cup hooks just like these:


Like I've mentioned before, W.Tex is pretty windy. To keep the curtains from blowing around, we added washers in pockets in the bottom hem.

To keep the curtains contained when they're not needed for shade, we created some basic sashes to tie up the curtains. The fabric for these was about $10 with a 40% off coupon from HobLob.


Step 5: EN-Joy!
And.....here is the finished product!


We love it!
I wouldn't take on a project this big every month, but I think if these last us a couple of years it'll be well worth it! We're not leaving them outdoors when we're not using them to try to extend their life. They  block a ton of sun (and wind) when they're up. Perfect for the W.Tex sun!